


Mastering Low Light Photography: Techniques and Tips for Stunning Nighttime Shots
Low-light photography focuses on capturing images in environments with scarce light, like a dim library, a moonlit forest, or a low-lit jazz club. It demands innovative techniques to transform limited light into unique visuals, unlike well-lit photography.
Mastering low-light techniques unlocks new creative dimensions, especially for nighttime photography. Night scenes, with streetlights, car headlights, and neon signs, have a distinct charm. These techniques let photographers freeze car movements into light trails or capture the moon’s soft glow, adding magic and telling unique nocturnal stories.

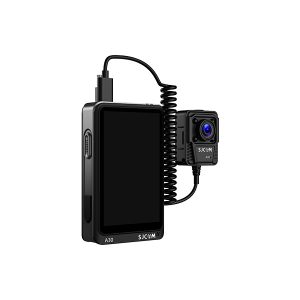
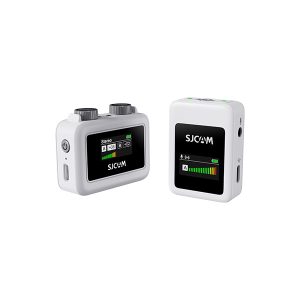
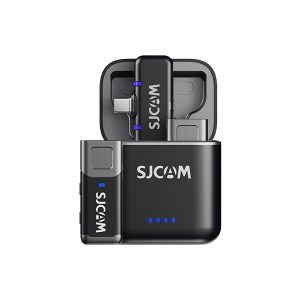
SJCAM C300 as a Low Light Photography Tool
The SJCAM C300 action camera is a remarkable device for low-light photography. It features an impressively large aperture, which is a game-changer in low-light conditions. This design choice enables the camera to increase its light intake by a substantial 40% compared to cameras with standard apertures.

Common Low Light Photography Scenarios
Low-light photography is used in various scenarios. Nighttime cityscapes, with their illuminated buildings and traffic, are popular. Indoor events like concerts or theater performances, dawn and dusk wildlife shoots, and shooting in dimly lit places like old castles or overcast forests also present low-light challenges and opportunities.
Essential Techniques for Low Light Photography
Long Exposure Techniques
Long exposure keeps the camera’s shutter open for an extended time, letting more light in. It blurs moving objects, like turning waterfall water into a smooth stream, capturing car light trails at night, or creating star trails in the night sky.
Tips for Effective Long Exposures
A tripod is essential for long exposure to prevent camera shake. Using a remote shutter release or self-timer helps, too. Experiment with shutter speeds: 1-10 seconds for a flowing river and several minutes for star trails. Neutral density filters can enable longer exposures in brighter low-light conditions.
Camera Settings
ISO Settings and Their Impact
ISO measures camera light sensitivity. In low light, increasing ISO makes the camera more sensitive, but it also adds noise (grain) to the image. Start with a low ISO, like 400 or 800, and increase if needed. Cameras like the SJCAM C300 handle high ISO better, reducing noise.
Aperture Adjustments for Low Light
A wider aperture (smaller f-number like f/1.8 or f/2.8) allows more light in, ideal for low light. It also creates a shallow depth of field, blurring the background while keeping the subject in focus. However, extremely wide apertures may reduce edge sharpness, so experiment for the right balance.
Shutter Speed Considerations
In low light, a slower shutter speed lets more light in but risks camera shake. Use a tripod. The right shutter speed depends on the subject. For still subjects, a slow speed can increase exposure. For moving subjects, a fast speed may freeze the action, or a slow speed can creatively show motion, like a dancer’s movement.
Use of Tripods and Stabilization
Importance of Stability in Low Light
Stability is crucial in low light due to slow shutter speeds. Even slight camera movement blurs the image. A tripod provides a stable base, especially for long exposures. In some cases, monopods or in-camera/lens image stabilization can be used, but a tripod is most reliable.

Recommended Tripod Types and Techniques
Lightweight travel tripods are great for mobile photographers. Heavy-duty studio tripods offer maximum stability for stationary shoots. Monopods are an option when mobility is important. Carbon fiber tripods are popular for being lightweight and sturdy. Set up tripods on flat, stable surfaces, adjust height and angle for composition, and use tripod heads with smooth movements and quick-release plates.
Creative Composition Strategies
Utilizing Available Light Sources
In low light, use natural light sources like the moon (for silhouettes) or starlight. Indoors, a lamp or candle can create a focal point. Position the subject relative to the light to create shadows and highlights, like in a window-lit portrait.
Framing and Perspective in Low Light
Experiment with different angles. Low-angle shots can make subjects seem imposing, and high-angle shots offer unique perspectives. Use foreground, middle-ground, and background elements for depth and leading lines (like a path or row of lights) to draw the viewer’s eye.
Experimenting with Light Trails and Motion Blur
A long exposure captures light trails from moving objects like cars, adding dynamism to city night scenes. Motion blur can also convey movement in other subjects, like a dancer. Adjust shutter speed and subject movement to control the amount of blur.
Post-processing Tips for Enhancing Low Light Images
Use software like Adobe Lightroom or Photoshop. Adjust exposure, contrast, and color balance. Use noise reduction tools, but avoid over-processing. Adjust levels and curves for tonal range and selective editing for specific enhancements.
Conclusion
Mastering low-light photography involves understanding its challenges and using techniques like long exposure, proper camera settings, and stabilization. Creative composition and careful post-processing also play important roles.
Low-light photography offers endless creative opportunities. Practice and experiment with different techniques, settings, and compositions to develop your style and capture stunning images.
The SJCAM C300 is a great choice for low-light photography. Its low-noise, high-ISO performance, compact design, wide-angle lens, and video capabilities make it a valuable tool for beginners and experienced photographers alike.

Latest Blog Posts


